Installation
Install the SDK, which is available on NPM.- npm
- yarn
Initialization
Next the SDK can be imported into a front-end TypeScript or JavaScript project.- React
- JavaScript
copy
- React
- JavaScript
copy
Options
TheHallidayPayments constructor initializes the Halliday JS SDK instance and prepares the widget interface to subsequently be opened and displayed to the user.
To open the SDK widget interface, like in a deposit button click event handler, use the openDeposit function. More on the deposit button pattern in the SDK Deposits section.
More on config and wallet updates below.
Both the constructor and updateConfig functions accept all of the following configuration options.
Owner
Theowner is a self-custody wallet that controls the user’s payment onchain. In the event a payment becomes stuck, the user can generate an EVM signature to withdraw the assets or route them to a recovery payment.
In addition to EOA users, owner configuration options are available below for users that either do not have a wallet at all or have a non-EVM compatible wallet.
Owner - EOA
This type of direct owner configuration is best for users that connect their own EOA wallet to the page like MetaMask, Rabby, Phantom, et al.Owner - Wallet Auth
The user authenticates by providing an EVM signature confirming ownership of payments with their EVM wallet address. This is commonly used for owning payments that are initialized on non-EVM chains. If the user does not have an EVM wallet, an embedded wallet can be used with an emailed one-time passcode, which is detailed in the next section.Owner - OTP Auth
Email one-time passcode authentication. The auto-generated embedded EVM wallet is the owner of payments. This method is a proper option if the user does not have a wallet or connects a non-EVM compatible wallet.Deposit
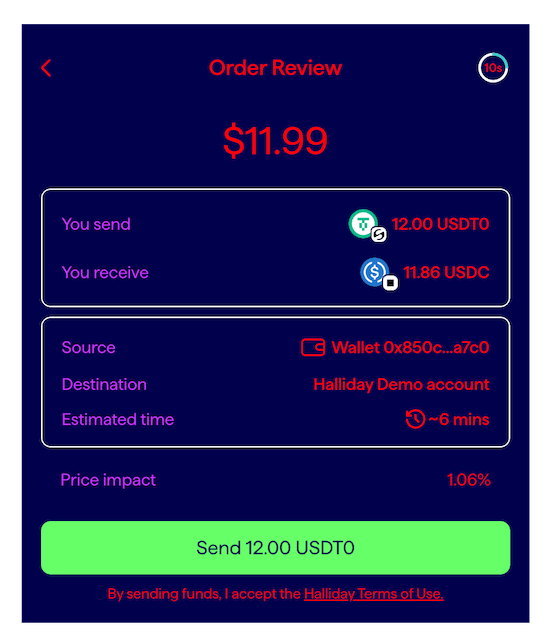
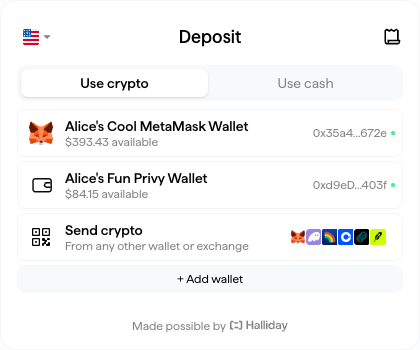
The following are configuration options for onramps or cross-chain deposits of assets to a specified destination address e.g. the user’s wallet or an in-app smart contract wallet.Withdrawal
The following are configuration options for the withdraw widget. This is used for withdrawing assets from the user’s wallet or an in-app smart contract wallet to another address.FunderRole
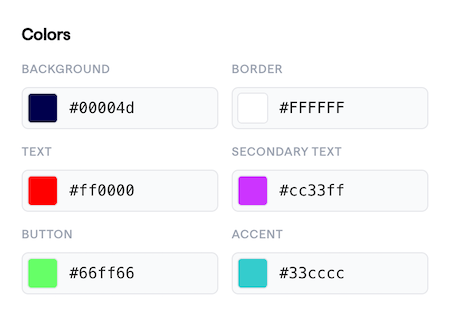
Configuration options for each funding wallet with transaction capability.CustomStyles
All fields are optional. Colors are CSS color strings.Type Definitions
Usage Patterns
Config and Wallet Updates
After initialization, the instance’supdateConfig function can be used to pass more parameters or overwrite previously passed parameters.
The React SDK has conventional React state management functions, so updateConfig should not be used. Properties should be used to update config settings on the HallidayPaymentsProvider.
For wallet changes, the React SDK has the updateWallets function returned by the useHallidayPayments hook.
- React
- JavaScript
copy
Ready & event handlers
The Halliday instance monitors events that an event handler can be registered for.- React
- JavaScript
copy
ready function. The promise resolves with no value once the initialization of the Halliday widget is completed. If there is an error in initialization a WidgetLoadError will be passed to the rejection.
iframe postMessage events
The Halliday SDK’s iframe will pass messages through thewindow.postMessage() function.
Integrations of the Halliday widget do not require monitoring of these events.
The following example illustrates logging of these events for debugging purposes.
Using the wallet connector
Halliday can prompt users to choose a wallet to connect to the app. The wallet connector provides many options including MetaMask, Coinbase Wallet, Rainbow, or Wallet Connect. Clicking the button will trigger the connect-wallet prompt. If the application already prompts the user to connect a wallet, see using a connected wallet.- React
- JavaScript
copy
Using a connected wallet
The Halliday JS SDK can accept an existing wallet connection object that an app has already established. With this flow, users do not need to reconnect their wallet using the Halliday external wallet modal, creating an optimal user experience for Web3 applications. If the application does not already have a connected wallet, see using the wallet connector. Support for existing Viem, Wagmi, and Ethers.js wallet connections are available to Halliday JS SDK developers. These functions also allow the widget to utilize the proper account if the user switches the address or network in their wallet extension.copy
Viem
- React
- JavaScript
copy
Wagmi
- React
copy
Ethers.js
- React
- JavaScript
copy
Dynamic
The following code example is a demonstration of passing a Dynamic embedded wallet provider to the Halliday JS SDK in a full React app which is available in the SDK example apps section.- React
copy
Privy
In addition to the following code example, a demonstration of passing a connected Privy wallet to the Halliday JS SDK in a full React app is available in the SDK example apps section.- React
copy
Turnkey
Turnkey embedded wallet signatures can be integrated with the Halliday JS SDK using the@turnkey/react-wallet-kit and @turnkey/viem SDKs with viem and @halliday-sdk/payments. The developer is required to create an interface for the Turnkey SDK. A full React.js code example is available here: Halliday JS SDK Turnkey React.js Example.
Multiple Funders
In the scenario that a developer chooses to show multiple possible funding sources for the user, an array of funder objects can be passed asdeposit.funders to the HallidayPayments constructor (or later via updateConfig / updateWallets).
Funders can be any address that is expected to fund a payment. The SDK widget will take account of token balances at the time of a payment so the user can select a possible input token and amount.
Naming Each Funder
To differentiate funders in the UI, a name string can be supplied that will be shown to the user. Pass walletName as a member of each funder object.
- React
- JavaScript
copy
Embedding the SDK Widget
By default, the Payments Widget opens as a modal overlaying the web page. Another option is to embed it within a page. In React, render the<HallidayEmbed> component where the widget should appear. In JavaScript, provide the targetElementId option.
- React
- JavaScript
copy
Customizing styles
Halliday supports setting custom styles on the Payments Widget in order to match an application’s existing user interface.- React
- JavaScript
copy